Showing posts with label Crafters Companion. Show all posts

Wednesday, 6 August 2025

Floral Spray 🌺


Hi everyone, I mentioned in a recent post that I had bought a craft magazine, which when I opened it contained some unexpected treasures that weren’t really indicated on the packaging as it was a “sale bundle”.  Well, today I have made a card using the stamp set that actually motivated me to purchase the magazine in the first place - a lovely floral spray by Crafter’s Companion.


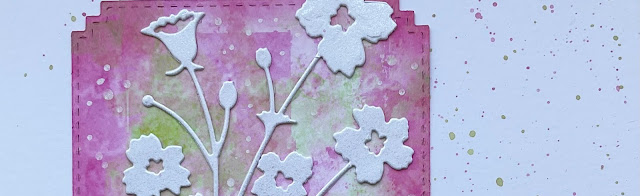
I die cut a stitched rectangle from white stamping card, then stamped and heat embossed the flower spray in gold. I coloured the image using Zig pens and added some gold Posca spatter. When dry I matted onto a larger stitched square cut from a snippet of pearlescent pink card and onto a 7” x 5” card blank. Finally I die cut the sentiment from snippets of gold and black card, glued together and attached. A fairly straightforward traditional card, but I’m pleased with how it turned out.


Stamps: Crafter’s Companion flower (free with craft magazine);
Media: Versamark; WOW metallic gold embossing powder; Kuretake Zig Clean Color watercolour pens; Posca pen (gold);
Tools: Hunkydory Moonstone Duo- Stitched rectangle dies; Simon Says Stamp Script Thanks die.

Challenges I would like to enter:

Ally’s Angels #96 - Anything Goes
Beautiful Blossoms #31 - Anything Floral Goes (2nd entry)
Crafty Catz #699 - Anything Goes (2nd entry)
Ellibelle’s Garden Party #5 - Anything In or From a Garden (2nd entry)
NBUS #77 - Use Your Never-Before-Used Schtuff
(floral stamp)
Simon Says (Wednesday) - Anything Goes (3rd entry)
Snippets Playground #512 - Use Snippets - TOP PICK
Triple B (August) - Birds, Butterflies and/or Blooms with optional Mood Board


Word Art Wednesday #710/711 - Anything Goes (3rd entry)

Take care, and thanks for visiting.
Hugs,

Monday, 22 April 2024

Lily of the Valley


Hi everyone, today I would like to share a card I made using a beautiful stamp and die set I won a couple of weeks ago over at the Snippets Playground, and also show you my recent attempt to get a grip of my coloured card snippets.

Last year I bought a 12” square paper holder from Crafter’s Companion which has proven a very neat way of holding my complete sheets of 12x12 card and paper, but sad to say my snippets were inelegantly leaned up against it in a carrier bag in the corner of my craft space! I had reached the stage where I couldn’t find a particular colour card snippet when required so I needed to do something … but said paper holder is now no longer available from CC - and seems to be out of stock almost everywhere - waah! Last week however I managed to track one down with another stockist and also bought the coordinating divider pockets which weirdly are still available from CC … so after a happy hour of sifting and sorting I now have all my card snippets organised by colour family - yippee!! My only complaint is that the labels for the dividers don’t stick, but I can see what’s what and just need to lift one divider pocket out of the bag to look for a given colour card - result!


The first snippet I found and brought into play was a large green one for the frame on my card … here it is.


I cut a piece of white stamping card and created an inky background with smooshed Distress Oxide inks and a little background stamping from an AALL & Create set. I then stamped the flower onto a separate snippet of white card, coloured with Zig pens and Spectrum Noir sparkle pen, and die cut out.


I die cut the stitched frame from my green card snippet, stamped and die cut the tag from a separate white snippet, then assembled the card onto a 7” x 5” card blank.

Stamps: Crafter’s Companion stamp & die set May - Lily of the Valley; AALL & Create #623 Elegant Spring Florals;
Media: Tim Holtz Distress Oxide inks (Tumbled Glass, Broken China, Cracked Pistachio); Versafine Clair (Nocturne, Warm Breeze); Kuretake Zig Clean Colour watercolour pens; Spectrum Noir sparkle pen (clear);
Tools: CC stamp and die set as above; Hunkydory Moonstone Duo-Stitched Rectangle dies.

Challenges I would like to enter:

Beautiful Blossoms #16 - Anything Floral Goes (2nd entry)
Creative Knockouts #519 - Spring Is In the Air (3rd entry)
Dragonfly Dreams (April) - Use a Die (2nd entry)
Simon Says (Monday) - Make Your Own Background (5th entry)
Unicorn #97 - Use Dies (2nd entry)
Word Art Wednesday #643/644 - Anything Goes (5th entry)

Take care and thanks for visiting.
Hugs,

Saturday, 14 January 2023

Allsorts Challenge #711


Good morning everyone, it’s Saturday again so it's time for another weekly Allsorts Challenge. This week Lorraine has chosen the theme and it is

*** Anything Goes with option Winter Blues ***

As mentioned last week, from now on we will still be publishing weekly challenges with prizes for each challenge, and a Top 5 will be announced every Friday at 6pm. However the prize winners will all be announced monthly starting on Friday 27 January.


This month’s prizes come from Oakwood DirectStamp AddictsSizzix and AALL and CreatePlease click on the links to visit their individual websites, and you can read more about them on our Patrons’ page.


Here's my card for this week.


This theme immediately made me think of Christmas, so I took the opportunity to make my first Christmas card of 2023. This also enabled me to have my first play with a gorgeous intricate die set I bought in December at the Crafter’s Companion shop, and, more importantly, my main Christmas present from my darling husband ❤️


Woo hoo!!! 😍 Mind you,  I hear you ask … what took me so long to get round to using it??? Well .. we were away over Christmas and New Year, so the wrapped box wasn’t taken with us as it is pretty heavy .. and when I got back I was very busy for a few days catching up with myself. I decided to wait til I had got time to look at everything properly, and this is the first result 😀. Early days yet but so far I’m very pleased … it certainly requires a lot less brute strength and elbow grease than my trusty old Cuttlebug …particularly for intricate dies.

I die cut my snowflake frame from pearlescent white card and a matching square of white stamping card. I then created a sponged Distress Oxide background with 3 colours of blue, and stamped a little forest of trees using various Lavinia stamps, different shades of Versafine Clair and 1st/2nd generation stamping, which I highlighted with Sakura Stardust pen. I stamped a Penny Black Christmas sentiment with Versamark and heat embossed with silver embossing powder, and added some white Posca pen spatter to represent falling snow. When the panel was dry I attached the snowflake frame, and then matted it onto a die cut stitched square cut from blue linen card stock. Finally I matted everything onto a card blank and added some silver sparkly gems to accent the snowflakes.

Here is an angled picture to capture the shiny silver of the sentiment + the sparkle.


Stamps: Lavinia Fairy Fir Tree (Small), Fairy Fir Tree 2 (Small), Fairy Fir Tree 2, Fir Tree 1, Christmas Tree Group, Red Pine (Small); sentiment - Penny Black "a wish..." (3502F);
Media: Distress Oxide inks (Stormy Sky, Blueprint Sketch, Chipped Sapphire); Versafine Clair  (Twilight, Medieval Blue, Morning Mist, Nocturne); Versamark; detail silver embossing powder; Sakura Stardust pen (clear); Posca pen (white);
Tools: Crafter’s Companion die set - Falling Snow; Hunkydory Moonstone die - Duo-Stitched Squares;
Other: sparkly gems from my stash.

Challenges I would like to enter:

ABC Christmas Challenge - A is for Anything Christmas
Little Red Wagon #687 - Baby It's Cold Outside! - FEATURED 
Make My Monday #191 - Something New (3rd entry)
Path of Positivity #108 - Anything Positive Goes with option Inspired By a Word Collage - TOP PICK and VOTER’S CHOICE
(I was inspired by the words in the example word collage …particularly “snowfall” and “sparkle”

Sparkles Christmas Challenge #144 - Sparkle and Glitter Accents - TOP 3
Stamping Sensations (January) - Add Some Sparkle (2nd entry)
Try It On Tuesday - In With the New - END OF YEAR SPOTLIGHT 2023
Word Art Wednesday #577/578 - Anything Goes (3rd entry)

Hope you can join us this week, and I look forward to seeing your entries. Don't forget to visit the challenge blog to see more fab inspiration from the rest of the team. Thanks for visiting.
Hugs,

Saturday, 7 January 2023

Allsorts Challenge #710


Good morning everyone, it's time for the first Allsorts Challenge for 2023. I hope you have all had a lovely Christmas and New Year, and that you're raring to go with some new challenges. This week Mervi has chosen the theme and it is

*** Something New ***

You could share a make for a "new" occasion such as New Home, New Baby, or if Santa has been kind you could have a play with your new stash!!

With the New Year we are making a few changes … From now on we will still be publishing weekly challenges with prizes for each challenge, and a Top 5 will be announced every Friday at 6pm. However the prize winners will now all be announced monthly - more details of our prize schedule and how it will work are on the Allsorts Challenge blog.


This month’s prizes come from Oakwood DirectStamp AddictsSizzix and AALL and Create. Please click on the links to visit their individual websites, and you can read more about them on our Patrons’ page.


I was away over Christmas and New Year, so I actually made this card before Santa had been to call .. and I decided to use some new stash I acquired in the Black Friday sale. Here is my card using a new Visible Image stencil “Butterfly Ink”, along with new background stamps and a sentiment from an older set which I believe I haven’t used before.


First I lined up the small butterfly stamp and stencil on my square of stamping card, then removed the stencil and stamped/heat embossed the butterfly stamp. I masked the butterfly and stamped the background, then applied Distress Oxides through the butterfly stencil. I stamped the motivational words on the wings and my main sentiment, then removed the mask and coloured the stamped butterfly with Sakura Stardust pens. 

Here is an angled pic to show the sparkly butterfly wings.


Stamps: Visible Image VI Minis #1 (butterfly), Where Flowers Bloom (background); Indigo Blu Sarah’s Choice (motivational words); Crafter’s Companion (sentiment);
Media: Tim Holtz Distress Oxide inks (Picked Raspberry, Peacock Feathers); Versafine Clair (Nocturne, Charming Pink); Sakura Stardust pens (pink, jade green);
Tools: Visible Image stencil - Butterfly Ink

Challenges I would like to enter:

C.R.A.F.T. #663 - New (2nd entry)
Creatalicious #250 - Anything Goes with option Something New (2nd entry) - TOP 3
Make My Monday #191 - Something New (2nd entry)
Simon Says (Wednesday) - Something New (2nd entry)
We Love Stamping (January) - Favourite Colours
(There are several colour combos I favour, but one is definitely pink + green)
Word Art Wednesday #577/578 - Anything Goes (2nd entry)

Hope you can join us this week, and I look forward to seeing your entries. Don't forget to visit the challenge blog to see more fab inspiration from the rest of the team. Thanks for visiting.
Hugs,

Tuesday, 8 March 2022

Quick and easy die cuts


Hi there … today I would like to share a quick card I made yesterday in between some DT and family card making commitments. 


I recently received some new stitched rectangle dies from Amazon and have been looking forward to using them.  I cut a stitched rectangle from a snippet of  gorgeous Bo Bunny paper which has a distressed look and faint background script, and then sponged the edges with Distress oxide ink to deepen the colour a bit more. I spattered the card base lightly with 2 colours of DO, adhered my stitched rectangle, and then attached a die cut flower spray cut from a snippet of pearlescent white card. A quick stamped sentiment, a few sparkly gems and some white Posca pen spattering on the paper, and I was done.

Unfortunately despite (or maybe because of) the very sunny weather the photography isn't very good ... photos in direct sunlight don't seem to work, but photos in shade are a little dull today!

Stamps: sentiment: Crafter's Companion - Magical Sentiements;
Media: Tim Holtz Distress oxide inks (Picked raspberry, Twisted Citron);
Tools: Memory Box Bella Bouquet die; stitched rectangle die from Amazon;
Old Bo Bunny paper and gems from my stash. 

Challenges I would like to enter:

Dies R Us #188 - Anything Goes with a Die Brand sold by DRU
(I have used Memory Box)
Fab 'n' Funky #546 - Dies or Stencils (2nd entry)
Simon Says (Monday) - Add Some Green
Simon Says (Wednesday) - Add A Die Cut (2nd entry)
Time Out #208 - 8th Birthday Challenge  (3rd entry)

I'm hoping to get a bit more crafting in over the next couple of days ... If I do I'll be back soon with another share.

Take care and thanks for visiting.
Hugs,

Sunday, 19 December 2021

Believe In the Magic


Hi everyone,

I needed to post the “Four Seasons” bookmarks  that I had made as a small Christmas gift to a good friend, and I decided that I needed a mini gift card to write a message in to accompany them in their padded envelope… so here it is.


This card is just 4” square. .. I have never made such a dinky card before and I rather liked working in such a small space.  I sponged a circle with Distress Oxide inks working inwards from darkest colour to the lightest, then bleached out some colour with spattered water droplets. I stamped my tree and fairy using Versafine Clair, and added some stars as if she is sprinkling stardust over the tree … which in my imagination results in the creation of a silver holographic star on top of the tree. I added a few more stars around the edge using Brilliance pearlescent ink, stamped my sentiment and finished off with some Sakura Stardust pen highlights and a few gems. Fairly quick by my standards, but I’m pleased with how it turned out. 

Here's a close up to show the sparkle.


Stamps: Lavinia Fir Tree 1, Stars 1 Mini; Fairy and sentiment from Crafter’s Companion “Fairy Kisses” set;
Media:Tim Holtz Distress Oxide inks (Chipped Sapphire, Salty Ocean Tumbled Glass); Versafine Clair - Twilight; Brilliance Pearlescent ink - ?; Sakura Gelly roll pen - Stardust;
Holographic star peel off and gems from my stash.

Challenges I would like to enter:

Classic Design Challenge (December) - Anything Goes (4th entry)
Crafty Calendar (December) - Christmas (2nd entry)
Crafty Sentiments - Anything Goes (2nd entry)
Simon Says (Monday) - Cold As Ice (3rd entry)
Simon Says (Wednesday) - Bling It On (2nd entry)
Sparkles Christmas #131 - Non-Traditional Colours
Stamping Sensations (December) - Choose A Theme and Stamp It (3rd entry)
(I have chosen Christmas magic)
Through the Craft Room Door - Anything Goes (3rd entry)
We Love Stamping (December) - Anything Stamped with option of CAS (2nd entry)
(I have chosen Anything Goes)

I still have one special card to make for my husband but I never publish that before he has opened it on Christmas Day, so what with all the preps required this week, this is probably my last published make before the big day. So I would like to wish you all a very Merry Christmas - hope you all stay safe, and  that we can look forward to a better 2022.
Hugs,

Saturday, 6 November 2021

Allsorts Challenge #649


Good morning everyone … It’s Saturday so it's time for another weekly Allsorts Challenge. This week Tracy has chosen the theme and it is

From Boys to Men

We have 2 more brilliant prizes on offer this week:

 Firstly, Craft Stash 


are offering this lovely Woodware stamp and sentiment set


and secondly, Ruth Hamilton Design


is offering 3 images of the winner's choice.

Here's my card for this week.


A couple of weeks ago I was in Derbyshire for the weekend, and  I visited the Crafter’s Companion Shop in Chesterfield during their 16th birthday week celebrations. The primary purpose of my visit was to get some cardstock and other craft basics, but while I was there I noticed they had some shelves of special "birthday bundles",  so I treated myself to one consisting of 3 stamp and stencil sets .. effectively less than half price - nice! A great way to increase my stock of basic stencil designs which was starting from a zero base as I never used them until recently 😀. 

This card was made using the stencils in the “It’s Time” set. Firstly I created a smooshed background with Distress Ink and Distress Oxide plus a matching smaller panel. I stencilled the hessian design using the same inks, then stencilled the clocks using Black Soot DO. I stencilled the largest clock onto the smaller inked panel using Versamark and embossed it with detail white embossing powder, then cut out and mounted on foam pads. I also added a teeny bit af 2nd generation text stamping, though that is hardly visible!  I stamped and embossed my sentiments and mounted on foam tape, and finished by blending Black Soot DO around the card edges and spattering the design lightly with my new gold acrylic paint. 

Here’s a tip for anyone in the UK who would like to use acrylic paint just for spattering so doesn’t need a lot  - I bought a pack of 4 mini tubes of metallic colours (gold, silver, copper, bronze) from WH Smith for just £2.49 😀

I noticed afterwards that the embossing on my sentiments was a bit untidy ... I think I got distracted as I had a small embossing powder spillage!  So my story is that it's all part of the grungy vibe!!

Stamps: background text - Woodware “Additions”; sentiments - Uniko “Birthday Sentiments”;
Media: Tim Holtz DI (Dusty Concord) and DO (Chipped Sapphire, Black Soot); WH Smith gold acrylic paint;
Tools: stencils from Crafter’s Companion stamp and stencil set  “It’s Time”.

Challenges I would like to enter:

Crafty Creations #427 - Anything Goes
Creative Fingers #218 Anything Goes
NBUS #32 Use Never before Used Schtuff
(mine is all my stencils + gold acrylic paint)
Paper Funday #35 - Anything Goes
Try It On Tuesday - It’s All About Time

Hope you can join us this week, and I look forward to seeing your entries. Don't forget to visit the challenge blog to see more inspiration from the rest of the team. Thanks for visiting.
Hugs,

Saturday, 3 September 2011

Penny Black Saturday #167 - Make A Scene


Hi everyone, and welcome to the latest Penny Black Saturday Challenge. Loved all your interpretations of Nat's sketch last week - don't forget to check the main challenge blog to see if you've won the yummy prize from Fantastic Ribbons.

Onto this week's challenge, and this time we would like you to

Make A Scene

No ... we don't want you to fall on the floor and throw a diva-ish fit as per Kerry on Celebrity Big Brother lol! What we have in mind is more a charming scene that incorporates your PB's in a delightful manner !! :-)  Take a peek at the wonderful creations by my fellow teamies and you will soon get the idea.

This week we have fantastic prizes (you can always rely on us for that!) for 2 randomly drawn winners:

First - from Penny Black


This delightful stamp - 3905K Christmas Fairy


and second ... from The Ribbon Girl

this yummy Green Mini Ribbon Kit.


Don't forget to check the main blog for the rules if you want to be eligible for either of these delish prizes!

This was a bit of an adventure for me as it isn't something I normally do,  but here's the result of my efforts.


Recipe:
Main image: Penny Black "Christmas Critters" transparent set, coloured with Promarkers and dusted with glamour dust;
Sentiment; Pink Gem Designs;
Paper: Craft Creations (blue snowy sky);
Tools: white pearlised card embossed with Cuttlebug "Snowflakes" folder (then ripped and edged with glamour dust); Marianne D Creatables trees (in 2 slightly different card shades to give a bit of dimension); Cuttlebug "snowflakes 2" die.

Here's a quick closeup to show some of the glamour dust  on the cute hats!


Challenges:
Penny Black at Allsorts (September) - Get Ahead for Christmas
Crafter's Companion #16 - Christmas Wishes
Rainbow Lady #168 - Emboss It
Fab 'n' Funky #88 - Go Mad With Embossing
Charisma #35 - Anything Goes
Passion for Promarkers #115 - Anything Goes (2nd entry)
I ♥ ProMarkers #81 - Anything Goes (2nd entry)

Hope you can join us this week!

Thursday, 14 April 2011

I Followed a tutorial …

CIMG2219

Whilst posting a distressed card to the Simon Says Stamp and Show blog for the first time the other day, I happened to notice a thumbnail of a gorgeous card by Nona. I visited her blog and really admired the card .. . the stamp she used had caught my eye as I bought the same set a couple of weeks ago, and also I loved the techniques she used. I saw she had followed a tutorial by Shari … so I went and had a look-see.

Having seen the tutorial I just had to have a go myself … I have recently bought a small number of distress inks, and am also loving the soft wildflower style of stamping right now.

The following card is my interpretation of the tutorial – I have followed the basics but have used a different script stamp (ie the one I have in my stash  lol!) and also changed the flower stamp for a Penny Black brushstroke stamp so that I could enter it for the Penny Black blog challenge :-) Instead of a linen background stamp as used in the tutorial I used a set of distress aged marks, and stamped them both onto the image and the base card to give an aged look. This is a bit of a new direction for me but I’m liking the change.

CIMG2219

Recipe:
Main image: Penny Black “Quite Dandy” inked and misted with distress inks in Tumbled Glass, Peeled Paint and Walnut Stain; matting distressed with Tim Holtz distressing tool;
Background stamping: Crafty Creations script stamp embossed with white detail powder: “Butterfly kisses” random markings stamped with antique Linen distress ink;
Sentiment: Penny Black transparent set “Salutations”;
Supplies: ribbon and pearls from my stash.

CIMG2222

Challenges:
Simon Says Stamp and ShowDistressing (2nd entry)
Truly Scrumptious #55 - Vintage
Penny Black Blog ChallengeFlowers (use a floral stamp)
Crafters Companion #11Aqua and Brown
Crafts & Me #30Ribbon
Totally StampaliciousAnything Goes

Hope you like it :-). I’m not sure about the card blank, and have already thought of some very subtle brown and aqua paper I have which I would use next time, but I’m quite pleased with this stamping technique for my first attempt.

Right … now this is my first ever Windows Live Writer post … looks perfect in the preview window … so here goes, fingers crossed!!